简体 | 繁体
loading...
海外博客
    • 首页
    • 新闻
    • 读图
    • 财经
    • 教育
    • 家居
    • 健康
    • 美食
    • 时尚
    • 旅游
    • 影视
    • 博客
    • 群吧
    • 论坛
    • 电台
  • 热点
  • 原创
  • 时政
  • 旅游
  • 美食
  • 家居
  • 健康
  • 财经
  • 教育
  • 情感
  • 星座
  • 时尚
  • 娱乐
  • 历史
  • 文化
  • 社区
  • 帮助
您的位置: 文学城 » 博客 »How to Photograph the Milky Way in 12 Steps

How to Photograph the Milky Way in 12 Steps

2017-04-27 07:32:42

玉渊潭八一湖

玉渊潭八一湖
故乡在哪里
首页 文章页 文章列表 博文目录
给我悄悄话
打印 被阅读次数
How to Photograph the Milky Way in 12 Steps
January 4, 2016 by Jason D. Little
I don’t recall ever meeting anyone who claimed to not be fascinated to some degree by the night sky. There’s just something hypnotic about gazing upon objects that are billions of years old and light years away, yet so many people feel a rather close affinity with these distant bodies. While the physical gulf between us and the stars is, in any currently feasible mode of manned travel, insurmountable, we’re generally content to simply stand out in the darkness and scan the skies unassisted by anything fancier than a basic telescope. Other than that, we have historically relied on all the breathtaking photos of space provided to us by the experts.

But we no longer have to leave all the fun to full-time astronomers; given the wide accessibility to and technological sophistication of digital cameras, anyone can photograph the universe. And one of the easiest astrophotography subjects to capture is also one of the most impressive: the Milky Way Galaxy. Let's look at exactly how to photograph the milky way for stunning results.
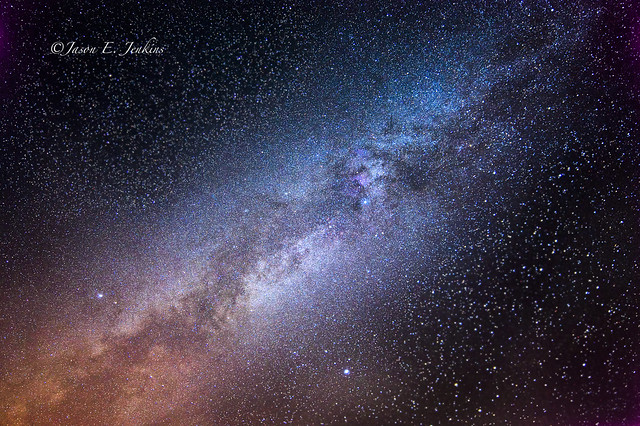
Photo by j-dub1980(THANK YOU FOR 100k+ Views), on Flickr

Obviously we can’t photograph the whole galaxy since we live inside of it; that famous white streak that dominates so much of the night sky is actually the light of billions of stars whose light, from our point of view on earth, seems to blend together, sporadically obscured by dust and gas clouds. In reality, all we are seeing is a small, edge-on view of the galaxy’s plane. Small, but impressive.

Photo by Josh Hawley, on Flickr

Here’s how you can capture a bit of the Milky Way for yourself.

1. Find a Dark Sky

Just waiting until nighttime won’t do. A dark sky free of light pollution  is the first and most important requirement to even seeing the Milky Way, let alone photographing it. Be prepared to travel a considerable distance, otherwise you run the risk of city lights making their mark in your shots. The moon can have a similar impact on your Milky Way photos; shooting during a full moon will wash out your images. Try to shoot during a new moon.

2. Know When and Where to Look

The part of the Milky Way that is most easily visible to the naked eye isn’t visible all year round, especially for those in the Northern Hemisphere where February through September are the optimal times. You will find your celestial subject in the southern half of the sky, rising from the west. Residents in the Southern Hemisphere may have a slight advantage in this regard, as the central parts of the Milky Way can be seen overhead.
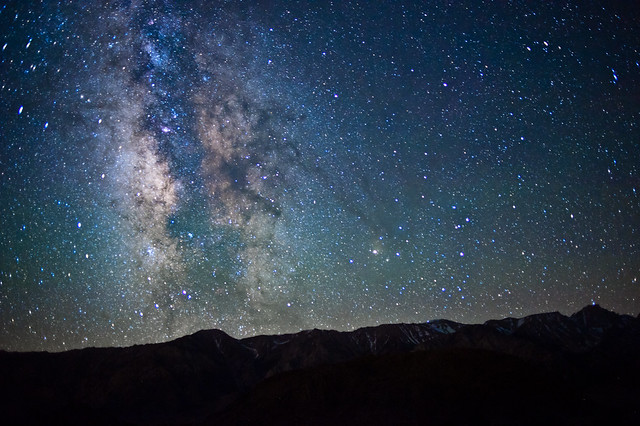
 

Photo by John Lemieux, on Flickr

3. Use a Digital Camera with Good High ISO Capabilities

You’ll be shooting at night with very little available light; you want your camera’s sensor to be able to handle the shooting conditions without introducing an excessive amount of noise. A full-frame camera is preferable but certainly not a necessity.

4. Use a Fast Wide Angle Lens

You should work with a lens with a maximum aperture of at least f/2.8; the faster the better. It’s not that you’re totally out of luck if your fastest lens is f/3.5 or so, but you’ll have more of a challenge on your hands since the lens won’t be able to gather as much light. The same principle applies to focal length; go as wide as you can. You may be seeing only a fraction of the Milky Way, but it’s still monstrous in size. The wider your lens, the more of it you can capture.

5. Use a Tripod

This really isn’t optional. Bells and whistles are nice, but sturdiness is your number one concern.

6. Use Live View

To avoid the headache of trying to focus in the dark, use your camera’s live view feature to manually focus on a bright star. Alternatively, you could use the distance markings on your lens (if it has them) to set hyperfocal distance.

7. Start with ISO 3200

Referring back to the first point, a high ISO is essential to collecting enough light to render a bright image of the Milky Way. Under typical conditions, ISO 3200 is a good starting place. Based on how well this plays with other camera settings, you can go higher or lower from there.
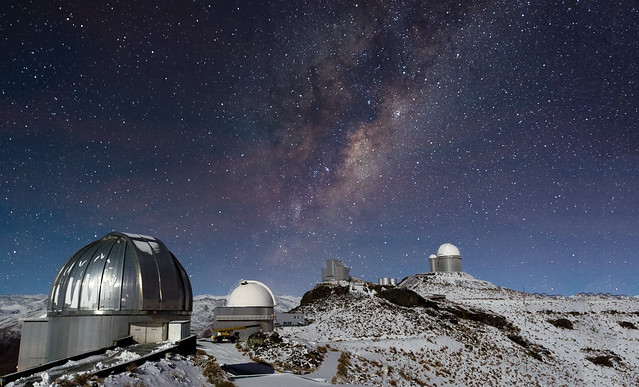
Photo by European Southern Observatory, on Flickr

8. Set a Long Shutter Speed

This is how you will capture more light and create a sufficiently bright exposure. There just one problem, though. The planet doesn’t care if you’re new at astrophotography; it’s going to keep on rotating, which means if you leave the shutter open for too long, you’ll end up with star trails. There’s nothing wrong with star trails when that’s what you’re aiming for, but they aren’t really desirable for photographing the Milky Way. To get pinpoint stars, use the “500 rule,” which calls for you to divide 500 by the focal length of the lens you’re using. So, if you have a 24mm lens on a full-frame camera, you will set your shutter speed to 20 sec. (500/24 = 20.83). If you’re working with a crop sensor camera be sure to account for the crop factor (typically 1.5 for Nikon and Sony, 1.6 for Canon). As an example, using the same 24mm lens on a Nikon crop, you’d end up with an effective focal length of 36mm (24×1.5 = 36). Applying the 500 rule will yield a shutter speed of 13 sec. (500/36 = 13.89). There are those who debate about whether to use the 500 rule or the similar 600 rule; without delving further into the mathematics of it all, it really is more a matter of visual perception. In short, stick with the 500 rule, especially if you intend to make poster size prints. If, after you’ve gotten more comfortable and done some experimenting, you find the “600 rule” works better for you (should be find for web images) then definitely go with that.

9. Set a Wide Open Aperture

Remember, it’s all about collecting as much light as possible; depth of field isn’t the primary concern here. In case of any significant softness you’ll want to stop your lens down. This is why it’s so important to use a fast lens in the first place; if you know your lens is unacceptably soft at f/1.4, stopping down to f/2 will sharpen things up without having a severe impact on the lens’ light gathering ability.

10. Compose your shot. There’s no right way or wrong way to compose your shot, but you can create a sense of depth by framing this as a standard landscape shot with the Milky Way serving as the background. Just because it’s dark out doesn’t mean you should forget about the foreground, though; you can add interest to your scene by including hills or mountains, trees, rock formations, or even a person. Experiment all you want.
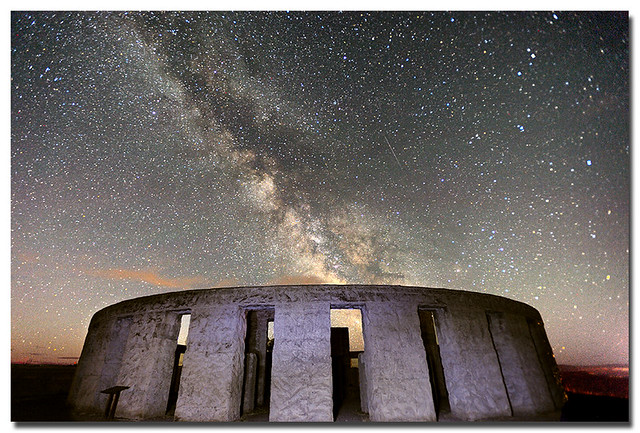
Photo by .Bala, on Flickr

11. Get a Satisfactory Exposure

It’s very likely that your first shot won’t be an exposure you’re satisfied with (if you’re not happy with the focus or composition, adjust those things before moving on to worrying about exposure). If the exposure isn’t “right,” you’ll have to identify the problem and work from there. If there’s too much noise, simply decrease the ISO. If the shot is overexposed, check your surroundings for light pollution; decrease shutter speed; stop down the lens; or decrease ISO. If it’s underexposed, make sure you’re using the widest aperture on your lens; increase shutter speed (but beware of star trails forming); increase ISO.

12. Process it

There will be a lot of variation at this final stage and, again, there is no one right way to handle the post processing of your shots. The two most important things you can do to make post processing a little easier is to shoot raw and get the best exposure you can in-camera. You may need to apply some sharpness and noise reduction. According to some sources, the color temperature of the Milky Way is around 4840°K; if you find it too much on the yellow/orange side, adjust white balance until you have a neutral scene. You will definitely need to increase contrast; it’s okay to be a bit heavy handed here, so long as you’re not losing shadow detail. If the photo editing software you are using allows curves adjustments, make use of it, as you can be more precise with your work. Assuming you got a good in-camera exposure you shouldn’t have to play with the exposure slider too much
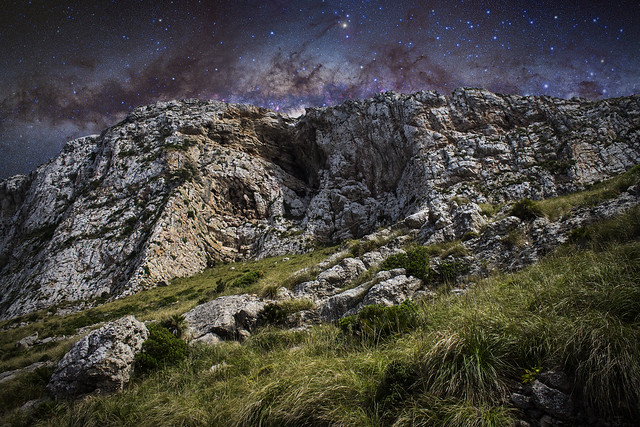

Photo by Damian Witkowski, on Flickr


As you can see, you don’t need a whole lot of specialized equipment in order to be successful in astrophotography. In addition to having a passion for the subject, you’ll certainly have to invest a lot of planning, practice, and patience. The pay-off, however, will be worth all the time and effort you expend.

登录后才可评论.
  • 文学城简介
  • 广告服务
  • 联系我们
  • 招聘信息
  • 注册笔名
  • 申请版主
  • 收藏文学城

WENXUECITY.COM does not represent or guarantee the truthfulness, accuracy, or reliability of any of communications posted by other users.

Copyright ©1998-2025 wenxuecity.com All rights reserved. Privacy Statement & Terms of Use & User Privacy Protection Policy

今日热点

  • 2025年回国感想九月红豆
  • 自我实现的预言——过度悲观是投资的大敌BrightLine
  • 我们这里正幸福我爱丁二酸钠
  • 輔仁大學與王光美德國徐沛
  • 从未见过如此厚颜无耻的“通报”开冒邱
  • 精神分裂患者的故事——活成一束光阿芒晒太阳
  • 一场招聘扭曲了社会价值取向,“拼爹”比“拼搏”更有效齐风猎
  • 历史文化名城-宜兴东河山村
  • 抗日战争持久战解放战争速胜战yongbing1993
  • 印錢治國:中美政客一樣黑invest_2024dec
  • 预防“老年痴呆症”,我们到底能做什么?江天云月
  • 2025 瑞士徒步及攻略 (1) 意大利米兰进出northlake
  • 抗日战争,国共两党谁是中流砥柱赵大夫话吧
  • 爸爸妈妈去划船水行者

一周热点

  • 在美国拔罐帕格尼尼
  • 我的闺蜜都比我美多伦多橄榄树
  • 新总理认怂 非全然跪舔hgwzx
  • 从移民到总统, 祝你生日快乐BeijingGirl1
  • 它曾抵挡箭矢,如今抵挡遗忘 (多图)康赛欧
  • 伊朗女生、韩国女生、加拿大女生:做爱彼迎民宿教育了我SUDreamers
  • 以色列——被逐出欧洲家园犹太人的无奈归宿(一)橡溪
  • 2025回国 拍电影 香港最接地气的地方(图)菲儿天地
  • 2025年回国感想九月红豆
  • BeijingGirl1真的被封号了吗?硅谷居士
  • 一个去菜场买菜都要照镜子的人翩翩叶子
  • 终究被女儿嫌弃了广陵晓阳
  • 沉痛悼念老同学孙必如李培永
  • 真正减税厉害的五条,地主应该可以用上第二和第五条,哈哈BrightLine
How to Photograph...
切换到网页版
玉渊潭八一湖

玉渊潭八一湖 名博

How to Photograph the Milky Way in 12 Steps

玉渊潭八一湖 (2017-04-27 07:32:42) 评论 (0)
How to Photograph the Milky Way in 12 Steps
January 4, 2016 by Jason D. Little
I don’t recall ever meeting anyone who claimed to not be fascinated to some degree by the night sky. There’s just something hypnotic about gazing upon objects that are billions of years old and light years away, yet so many people feel a rather close affinity with these distant bodies. While the physical gulf between us and the stars is, in any currently feasible mode of manned travel, insurmountable, we’re generally content to simply stand out in the darkness and scan the skies unassisted by anything fancier than a basic telescope. Other than that, we have historically relied on all the breathtaking photos of space provided to us by the experts.

But we no longer have to leave all the fun to full-time astronomers; given the wide accessibility to and technological sophistication of digital cameras, anyone can photograph the universe. And one of the easiest astrophotography subjects to capture is also one of the most impressive: the Milky Way Galaxy. Let's look at exactly how to photograph the milky way for stunning results.

Photo by j-dub1980(THANK YOU FOR 100k+ Views), on Flickr

Obviously we can’t photograph the whole galaxy since we live inside of it; that famous white streak that dominates so much of the night sky is actually the light of billions of stars whose light, from our point of view on earth, seems to blend together, sporadically obscured by dust and gas clouds. In reality, all we are seeing is a small, edge-on view of the galaxy’s plane. Small, but impressive.

Photo by Josh Hawley, on Flickr

Here’s how you can capture a bit of the Milky Way for yourself.

1. Find a Dark Sky

Just waiting until nighttime won’t do. A dark sky free of light pollution  is the first and most important requirement to even seeing the Milky Way, let alone photographing it. Be prepared to travel a considerable distance, otherwise you run the risk of city lights making their mark in your shots. The moon can have a similar impact on your Milky Way photos; shooting during a full moon will wash out your images. Try to shoot during a new moon.

2. Know When and Where to Look

The part of the Milky Way that is most easily visible to the naked eye isn’t visible all year round, especially for those in the Northern Hemisphere where February through September are the optimal times. You will find your celestial subject in the southern half of the sky, rising from the west. Residents in the Southern Hemisphere may have a slight advantage in this regard, as the central parts of the Milky Way can be seen overhead.


Photo by John Lemieux, on Flickr

3. Use a Digital Camera with Good High ISO Capabilities

You’ll be shooting at night with very little available light; you want your camera’s sensor to be able to handle the shooting conditions without introducing an excessive amount of noise. A full-frame camera is preferable but certainly not a necessity.

4. Use a Fast Wide Angle Lens

You should work with a lens with a maximum aperture of at least f/2.8; the faster the better. It’s not that you’re totally out of luck if your fastest lens is f/3.5 or so, but you’ll have more of a challenge on your hands since the lens won’t be able to gather as much light. The same principle applies to focal length; go as wide as you can. You may be seeing only a fraction of the Milky Way, but it’s still monstrous in size. The wider your lens, the more of it you can capture.

5. Use a Tripod

This really isn’t optional. Bells and whistles are nice, but sturdiness is your number one concern.

6. Use Live View

To avoid the headache of trying to focus in the dark, use your camera’s live view feature to manually focus on a bright star. Alternatively, you could use the distance markings on your lens (if it has them) to set hyperfocal distance.

7. Start with ISO 3200

Referring back to the first point, a high ISO is essential to collecting enough light to render a bright image of the Milky Way. Under typical conditions, ISO 3200 is a good starting place. Based on how well this plays with other camera settings, you can go higher or lower from there.

Photo by European Southern Observatory, on Flickr

8. Set a Long Shutter Speed

This is how you will capture more light and create a sufficiently bright exposure. There just one problem, though. The planet doesn’t care if you’re new at astrophotography; it’s going to keep on rotating, which means if you leave the shutter open for too long, you’ll end up with star trails. There’s nothing wrong with star trails when that’s what you’re aiming for, but they aren’t really desirable for photographing the Milky Way. To get pinpoint stars, use the “500 rule,” which calls for you to divide 500 by the focal length of the lens you’re using. So, if you have a 24mm lens on a full-frame camera, you will set your shutter speed to 20 sec. (500/24 = 20.83). If you’re working with a crop sensor camera be sure to account for the crop factor (typically 1.5 for Nikon and Sony, 1.6 for Canon). As an example, using the same 24mm lens on a Nikon crop, you’d end up with an effective focal length of 36mm (24×1.5 = 36). Applying the 500 rule will yield a shutter speed of 13 sec. (500/36 = 13.89). There are those who debate about whether to use the 500 rule or the similar 600 rule; without delving further into the mathematics of it all, it really is more a matter of visual perception. In short, stick with the 500 rule, especially if you intend to make poster size prints. If, after you’ve gotten more comfortable and done some experimenting, you find the “600 rule” works better for you (should be find for web images) then definitely go with that.

9. Set a Wide Open Aperture

Remember, it’s all about collecting as much light as possible; depth of field isn’t the primary concern here. In case of any significant softness you’ll want to stop your lens down. This is why it’s so important to use a fast lens in the first place; if you know your lens is unacceptably soft at f/1.4, stopping down to f/2 will sharpen things up without having a severe impact on the lens’ light gathering ability.

10. Compose your shot. There’s no right way or wrong way to compose your shot, but you can create a sense of depth by framing this as a standard landscape shot with the Milky Way serving as the background. Just because it’s dark out doesn’t mean you should forget about the foreground, though; you can add interest to your scene by including hills or mountains, trees, rock formations, or even a person. Experiment all you want.

Photo by .Bala, on Flickr

11. Get a Satisfactory Exposure

It’s very likely that your first shot won’t be an exposure you’re satisfied with (if you’re not happy with the focus or composition, adjust those things before moving on to worrying about exposure). If the exposure isn’t “right,” you’ll have to identify the problem and work from there. If there’s too much noise, simply decrease the ISO. If the shot is overexposed, check your surroundings for light pollution; decrease shutter speed; stop down the lens; or decrease ISO. If it’s underexposed, make sure you’re using the widest aperture on your lens; increase shutter speed (but beware of star trails forming); increase ISO.

12. Process it

There will be a lot of variation at this final stage and, again, there is no one right way to handle the post processing of your shots. The two most important things you can do to make post processing a little easier is to shoot raw and get the best exposure you can in-camera. You may need to apply some sharpness and noise reduction. According to some sources, the color temperature of the Milky Way is around 4840°K; if you find it too much on the yellow/orange side, adjust white balance until you have a neutral scene. You will definitely need to increase contrast; it’s okay to be a bit heavy handed here, so long as you’re not losing shadow detail. If the photo editing software you are using allows curves adjustments, make use of it, as you can be more precise with your work. Assuming you got a good in-camera exposure you shouldn’t have to play with the exposure slider too much


Photo by Damian Witkowski, on Flickr


As you can see, you don’t need a whole lot of specialized equipment in order to be successful in astrophotography. In addition to having a passion for the subject, you’ll certainly have to invest a lot of planning, practice, and patience. The pay-off, however, will be worth all the time and effort you expend.